|
There are currently no product reviews.
 ;
Very helpfull information and I highly recommend this source for needed information about your products.
 ;
More than pleased with my prurchase, very good product for the price.
;
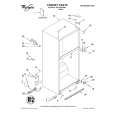
This is a good quality scan of the service manual which includes an assembly diagram, block diagram, schematic, and parts list. Exactly what is needed to repair my KR-V55R receiver.
;
Excellent concise manual. All needed information was included. Typeface and diagrams were clear. Very fair price considering what others are charging. Many thanks
;
Response is a little slow- I had to wait 12 hours to receive download link but it says that it may take up to 24hrs.
Manual is old and was not produced in PDF- scanned copy is exellent.
Overall- value for money- I recommend
HP5501B Service 3. To make sure that the tube does not begin heating perform the following with the laser head "OFF": a. On A3, the control board, change the HEATER jumper, JMP7, from NRM to OFF. b. ON A1, connector board, UNPLUG J3, the Hi Voltage Power Supply. 4. Turn "ON" the laser head and measure the Voltage on Test Pin 11 (A3TP11). It should be between .2 and .3 volts. NOTE: The measurement should be done immediately after the head is turned on. 5. 6. 7. 8. Calculate the heater adjust set point using the following equation: Vset = 1.285 X V(A3TP11) + 0.005 Volts Measure A3TP15 and adjust A3R16 until it equals Vset to ± 1 millivolt. Turn off the laser head. Move the HEATER jumper from OFF to NRM and PLUG J3, the HV Power Supply back onto it's connector on A1. Turn on the laser head again and wait until it locks. NOTE: If the laser does not lock, wait for two hours and repeat Step 1 - 5 using following equation: Vset = 1.285 X V(A3TP11) + 0.01 Volts then repeat Step 6 - 8. Measure A3TP11. It should be between 5 and 7.5 Volts! Leave the head on for another half an hour and measure A3TP11 again. The voltage will have decreased, but it should still be between 5 and 7.5 Volts!
9-2
© Agilent Technologies
|